Every January, a predictable wave of plastic failures arrives. Clips snap during installation on a cold loading dock. Housings crack when a dropped unit hits a frozen driveway. Fittings that survived years of summer service split during the first hard freeze. To the customer it looks like a sudden defect. To a materials engineer it usually looks like a part that was always operating closer to a brittle limit than anyone realized, and winter simply removed the margin.
The difference matters commercially. A cold-weather failure can be a design problem, a material problem, a processing problem or a misuse problem, and each one points liability and corrective action in a different direction. The fracture surface, read correctly, will usually tell you which.
Why plastics become brittle in the cold
Most engineering thermoplastics are tough at room temperature because their polymer chains can move enough to absorb energy before a crack runs. That mobility falls as temperature drops. Below a characteristic range, the material stops yielding and starts cleaving, and impact energy that would once have been dissipated as deformation goes straight into crack growth. This is the ductile-to-brittle transition, and it is not a single fixed number. It shifts with the geometry of the part, the speed of loading, the presence of notches and the condition of the material.
That last point is where most field failures live. A resin that is comfortably tough in an unnotched laboratory specimen at minus 30 degrees can be brittle at freezing in a molded part with a sharp internal corner, a weld line, or a molecular weight that was reduced during processing.
The usual suspects
A few material families account for a large share of cold-weather complaints, each for its own reason.
- Polycarbonate is famously tough, but it is notch sensitive. Its unnotched impact strength flatters it; a sharp radius or a surface scratch can collapse that toughness, and the effect worsens as temperature falls.
- ABS and other rubber-modified styrenics rely on dispersed rubber particles to stop cracks. If processing degrades the rubber phase, or if the grade chosen has marginal rubber content for the service temperature, low-temperature toughness disappears first.
- Polyamides (PA6, PA66) are strongly affected by moisture. Absorbed water plasticizes the polymer and improves toughness. A part molded dry and shipped into a cold, dry winter environment may never have the toughness that the conditioned datasheet values suggest.
- Polypropylene homopolymer has a glass transition close to freezing and can become brittle in ordinary winter conditions. Impact copolymers exist precisely to address this, and an unannounced substitution between the two is a classic failure route.
Why the datasheet does not settle the question
Resin datasheets usually report notched impact strength at room temperature and sometimes at one low temperature, measured by Izod or Charpy methods on molded test bars. Those numbers are useful for ranking materials, but they are a poor predictor of how a specific part will behave in January, for three reasons.
First, test bars are molded under ideal conditions, from dry, virgin resin, with a standardized notch. A production part has its own notches, weld lines, residual stresses and processing history, and any of them can dominate. Second, the strain rate in a standard impact test is not the strain rate of a part snapping during installation or a housing striking ice. Polymers are rate sensitive, and the transition from ductile to brittle shifts with loading speed. Third, the datasheet describes a new material. It says nothing about a part that has been exposed to sunlight, heat, chemicals or several seasons of moisture cycling before it meets its first severe cold.
The practical lesson is that low-temperature performance has to be demonstrated on the part, or on specimens cut from parts, under conditions that resemble service. When that testing was never done, an investigation often must do it after the fact, and the gap between datasheet and reality becomes part of the explanation for the failure.
What the fracture surface tells you
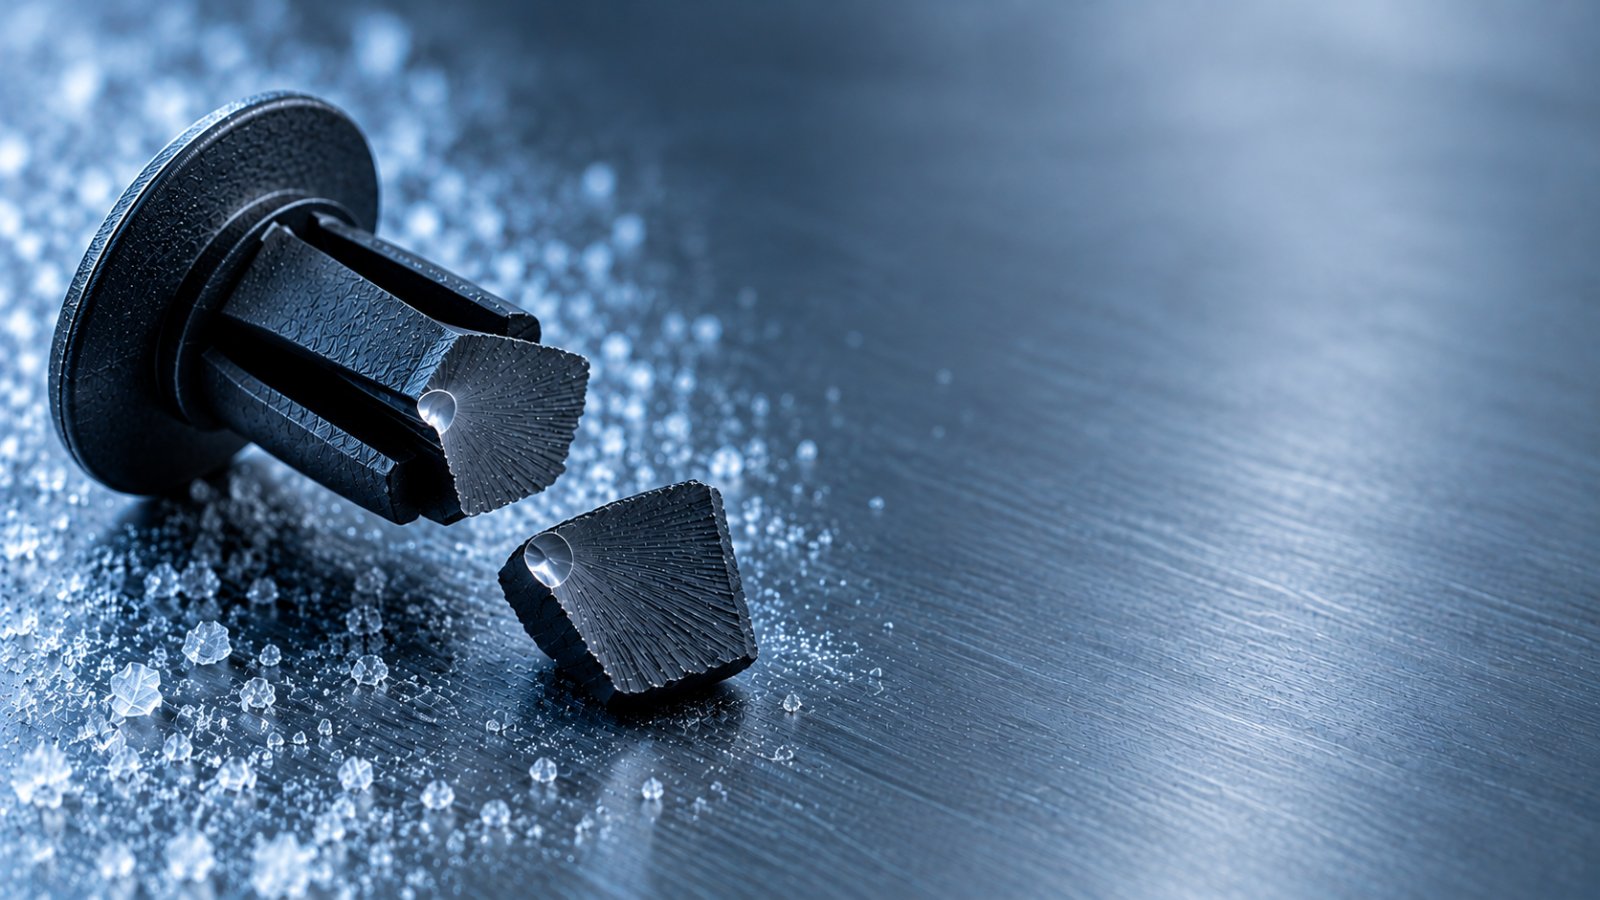
Fractography is the starting point of any credible investigation, and it is where hasty internal reviews most often go wrong. Brittle and ductile fractures leave different signatures. A brittle fracture in a thermoplastic typically shows a relatively flat surface with a smooth origin region, often called a mirror, surrounded by progressively rougher mist and hackle zones that point back to where the crack began. A ductile failure shows stress whitening, drawn material and gross deformation.
The origin is the most important single feature. If it sits at a sharp corner or a molded-in notch, design is implicated. If it sits at a void, an unmelted particle or a contaminant, processing or material quality is implicated. If it sits at a point of external damage, handling or misuse becomes a live question. The orientation of the fracture relative to flow lines and weld lines can show whether molding conditions created a weak plane the design never anticipated.
Confirming the material did what it should
Fracture appearance alone rarely closes a case. The next step is to test whether the failed part's material actually matches what was specified, and whether it was degraded along the way. A proportionate test program usually includes:
- Infrared spectroscopy (FTIR) to confirm polymer identity and detect oxidation or contamination.
- Differential scanning calorimetry (DSC) to check melting and crystallization behavior, which can reveal grade substitution, regrind effects or an unexpected blend.
- Melt flow rate or solution viscosity, comparing the failed part against virgin resin. A significant increase in melt flow indicates molecular weight loss, most often from excessive drying, long barrel residence time or too much regrind.
- Moisture content, particularly for polyamides, because the conditioning state at the time of failure is part of the story.
- Instrumented impact testing at the service temperature, on exemplar parts or specimens, so the comparison reflects the real failure conditions rather than room-temperature datasheet values.
Separating design, material, process and use
The objective is not to produce a list of test results. It is to answer a commercial question: why did this part fail, and who controls the fix? In practice the evidence tends to sort into four patterns.
A design cause shows origins at stress concentrations, consistent across failures, with material properties that match the specification. The fix is geometric: larger radii, relocated gates, ribs that do not intersect load paths.
A material cause shows the wrong grade, a substituted grade, or a grade whose real low-temperature performance does not support the application. The fix sits in specification and supplier control.
A process cause shows degraded molecular weight, voids, poor weld lines or moisture problems that vary with production lot. The fix sits on the molding floor.
A use cause shows origins at external damage or loading well beyond any reasonable service envelope. The fix may be labeling, packaging or customer guidance, and the question of responsibility changes with it.
Many real failures are combinations, and the honest answer is often that a marginal design was tipped over by a processing variation. Getting that apportionment right is what protects a company in a supplier negotiation or a warranty dispute.
The cost of a proportionate investigation
Companies sometimes hesitate to commission a proper root-cause investigation because the first instinct is to treat it as an expense on top of the warranty bill. In practice it is usually the cheapest part of the response. A focused program of fractography, a handful of characterization tests and comparative impact testing can typically be completed in weeks. Set against that is the cost of the alternatives: a design change that does not address the real cause, a supplier dispute argued without evidence, or a second winter of returns because the first fix treated a symptom. The goal is not exhaustive testing. It is the minimum evidence needed to make a confident decision about who fixes what.
Acting before the claims arrive
The most valuable time to do this work is before the first cold-weather season, not after the returns pile up. Three steps are worth taking now:
- Test at the temperature the product will see. Specify low-temperature impact performance on the drawing, on molded parts, not only on the resin datasheet.
- Control the inputs that erode toughness. Set limits on regrind, drying and residence time, and check melt flow on production parts periodically.
- Preserve failed parts properly. When returns begin, keep fracture surfaces clean, untouched and documented. A mating fracture face rubbed together in a bag can destroy the evidence that would have identified the origin.
A winter failure is rarely a mystery. It is usually a known mechanism meeting an unexamined margin, and that is exactly the kind of problem a disciplined investigation resolves quickly.
If your products are facing a cold-weather failure pattern, or you want an independent review before next winter's season, Flaney Associates provides failure and root-cause analysis for manufacturers and counsel. Discuss Your Challenge at flaneyassociates.com/contact.html or Get the Checklist on the true cost of materials failures at flaneyassociates.com/checklist.html.
Written by Joshua U. Otaigbe, PhD